OpenNMS installation on Windows Platform (Step by Step)

While on an official assignment i was asked to deploy open source Network Management System on the windows platform. While working on the task i got some problems and issues for which i was not able to find solution on internet and i got solution using hit and trial method. And then I thought to write on these problems and their solutions. But at the first step I will write step by step guide to install the of OpenNMS on Windows Platform (i.e. Windows XP or Win Server 2003)

Installation of OpenNMS will consist of 4 steps,

1. Installation of Java Development Kit
2. Installation of PostgreSQL
3. Initialize the Database
4. Adding JRRD library
5. installation of OpenNMS

1. Installation of Java Development Kit
  • Download the latest version of Java SE JDK from Java official website java.sun.com
  • Remember JDK is not just JRE and you need to download Java SE (Standard Edition) and not Java EE or Java ME or Java FX.
  • Run the JDK installer and it will ask for the License Agreement.
  • Click the Accept Button.
  • Click Next and installation will begin.
  • It will prompt to install JRE. Click Next to install JRE and then you will get the final window.
  • Press the Finish button to complete the installation of Java SE JDK.
2. Installation of PostgreSQL
  • Click next to proceed the installation
  • If it is required to change the destination path then select the installation directory, or simply press Next to proceed.
  • If it is required to change the destination Data Directory path then select the directory, or simply press Next to proceed.
  • Enter the password for the Superuser and Service account i.e. POSTGRES and press Next.
  • Enter the Server Listening port (Recommended to use the default port), and press Next.
  • Choose appropriate Locale or use Default locale and press Next.
  • Setup is now ready to install. Press Next to start installation.
  • Wait till the installer continues and finish screen appears.
  • Press the finish button to complete the installation.
3. Initialize the Database
  • If for any reason during the installation default database is not initialized then it can be done manually. Open the command prompt and go to the Bin directory of PostgreSQL. In my case it is "C:\Program Files\PostgreSQL\8.3\bin"
  • Initialize the database by using the following command "initdb -E UTF-8 -U postgres ..\data"
  • If "../data exists but is not empty" message appears then it means the Database is already initialized.
  • Run the Server by going to Start Menu --> Programs --> postgresql 8.X and click Start Server.
  • Follow the same path and click pgAdmin III.
  • Double click on postgresql 8.X (localhost:5432) to connect to the Database.
  • It will prompt for the password. Enter password and press OK button.
  • Select the postgres Database by following Databases --> Postgres.
  • Go to the file menu and select Options.
  • Under the Display tab activate the Languages as shown above, and press OK button.
  • Go back to the database postgres and expand it. Now Languages option will be available under tree. right click Languages and select New Language.
  • From the Name drop down menu select plpgsql and press OK button to add the language.
  • Exit pgAdmin.
4. Adding JRRD Library
  • Now JRRD is no longer distributed as part of OpenNMS. If you want to be compatible with RRDTool instead of JRobin then download JRRD from here.
  • Add library to the path variable.
5.
Installation of OpenNMS
  • Download latest version of standalone-opennms-installer-X.X.X.jar from the OpenNMS download page.
  • When download is finished then double click the Jar installer and it will start installation. If internet explorer saves the file as a ZIP file which contains different folders then it means that you have not installed java SDK.
  • Click Next.
  • Accept the license agreement and press Next button.
  • Select JDK home directory and select Next.
  • Select Installation directory and select Next.
  • Enter postgres user password and press Next.
  • Enter IP range to Discover nodes and press Next.
  • Press Next.
  • When installation completes press Next button.
  • When configuration and database installation completes press Next.
  • Click Done to finish the installation.
  • Open the command prompt and goto the openNMS bin directory. by default it would be C:\program files\opennms\bin
  • If you are installing the JRRD separately and your JRRD.jar file is placed at c:\opennms\lib then run following command
install.bat -disl "c:\opennms\lib"
  • Execute the following command
opennms.bat start
  • open your browser and open the link http://localhost:8980/opennms
  • Use admin user name and admin password to login to the web console.
  • and you are ready to Go with OpenNMS
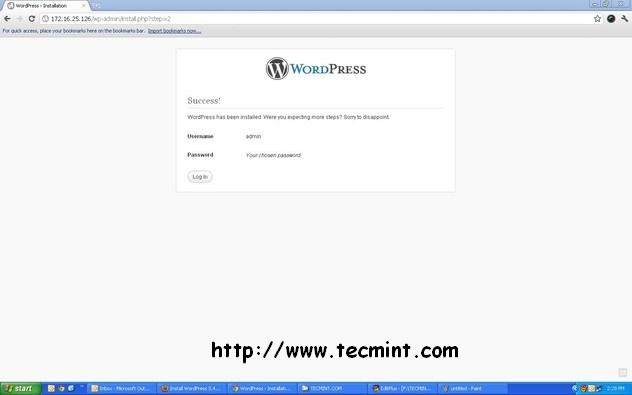
Install WordPress 3.5.2 Using LAMP or LEMP on RHEL, CentOS & Fedora


Well, on the internet you will find a number of good and better ways to install WordPress on Linux, but this installation guide is prepared for my future reference as well as for those beginners who are new to WordPress and Linux platform. In this installation I will show you’ll how to install latest WordPress 3.5.2 on RHEL 6.4/6.3/6.2/6.1/6/5.8, CentOS 6.4/6.3/6.2/6.1/6/5.8 and Fedora 18,17,16,15,14,13,12 distributions.
Install WordPress in Linux
Install WordPress Using Apache and Nginx
This guide has two way of installation, one is using LAMP (Linux, Apache, MySQL, PHP) and other is LEMP (Linux, Nginx, MySQL, PHP). So, please select your installation method based on your web servers. Before moving ahead let me provide you a little description about WordPress, LAMP & LEMP.

What Is WordPress?

WordPress is an open source and free blogging application and a dynamic CMS (Content Management System) developed using MySQL and PHP. It has huge number of third party plugins and themes. WordPress currently one of the most popular blogging platform available on the internet and used by millions of people across the globe.

What Is LAMP and LEMP?

LAMP (Linux, Apache, MySQL, PHP) and LEMP (Linux, Nginx, MySQL, PHP) is an open source Web application platform that runs on Linux systems. Apache and Nginx both are Web servers, MySQL is RDMS (Relational Database Management System) and PHP is a server side scripting language.
Install WordPress 3.5.2 on RHEL 6.4/6.3/6.2/6.1/6/5.8, CentOS 6.4/6.3/6.2/6.1/6/5.8 and Fedora 18,17,16,15,14,13,12
As I said above the installation method has two ways, one is using Apache and other is Nginx. So I have named it A and B. Those who want to install WordPress on their Apache server they can use A method and those who want to install WordPress using Nginx they can follow method B. In case, if you don’t have LAMP or LEMP setup on your systems, please use the following guides to install it.

Method A: Installing WordPress 3.5.2 for Apache on RHEL, CentOS & Fedora

This Method A installation guide shows you how to install latest WordPress 3.5.2 using LAMP setup on RHEL 6.4/6.3/6.2/6.1/6/5.8, CentOS 6.4/6.3/6.2/6.1/6/5.8 and Fedora 18,17,16,15,14,13,12.

Step 1: Downloading WordPress 3.5.2 for Apache

You must be root user to download the package.
# cd /tmp
# wget http://wordpress.org/latest.tar.gz

Step 2: Extracting WordPress 3.5.2 for Apache

Once the download finishes, run the following command to untar it.
# tar -xvzf latest.tar.gz -C /var/www/html

Step 3: Creating MySQL Database WordPress

Connect to MySQL server and run the following commands to create database and grant privileges.
## Connect to MySQL Server & Enter Password (if any or leave blank)## 
mysql -u root -p
Enter password:

## Creating New User for WordPress Database ##
CREATE USER wordpress@localhost IDENTIFIED BY "your_password_here";

## Create New Database ##
create database wordpress;

## Grant Privileges to Database ##
GRANT ALL ON wordpress.* TO wordpress@localhost;

## FLUSH privileges ##
FLUSH PRIVILEGES;

## Exit ##
exit
Please replace text a shown in Red color with your appropriate Database Name, User and Password. These settings we will required later.

Step 4: Creating Apache VirtualHost for WordPress

Open the file /etc/httpd/conf/httpd.conf with VI editor.
# vi /etc/httpd/conf/httpd.conf
Add the following lines of code at the bottom of the file. Replace the text shown in Red color with your required settings.

  ServerAdmin tecmint@tecmint.com
  DocumentRoot /var/www/html/wordpress
  ServerName wordpress
  ErrorLog /var/log/httpd/wordpress-error-log
  CustomLog /var/log/httpd/wordpress-acces-log common
Next, restart the Apache service to reflect changes.
# service httpd restart
Add the following line to /etc/hosts file.
127.0.0.1  wordpress

Step 5: Configuring WordPress Installation

Copy default wp-config-sample.php to wp-config.php to configure WordPress installation.
# cd /var/www/html/wordpress
# cp wp-config-sample.php wp-config.php
Open wp-config.php file.
# vi wp-config.php
Modify the following database settings as we created in the Step #3 above.
// ** MySQL settings - You can get this info from your web host ** //
/** The name of the database for WordPress */
define('DB_NAME', 'database_name_here');

/** MySQL database username */
define('DB_USER', 'username_here');

/** MySQL database password */
define('DB_PASSWORD', 'password_here');

/** MySQL hostname */
define('DB_HOST', 'localhost');

/** Database Charset to use in creating database tables. */
define('DB_CHARSET', 'utf8');

/** The Database Collate type. Don't change this if in doubt. */
define('DB_COLLATE', '');

Step 6: Finishing WordPress Installation

Open your browser and type any of the following address.
http://wordpress/

http://localhost


http://your-ip
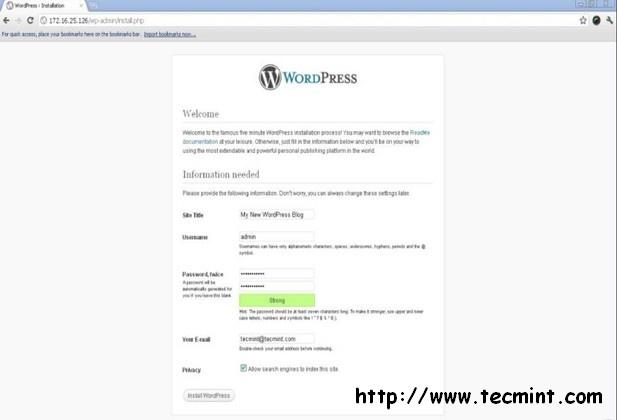
Give your Site Title, Create Admin User, Create Admin Password, Enter Your E-Mail and then click on Install button.
Creating WordPress Admin Login
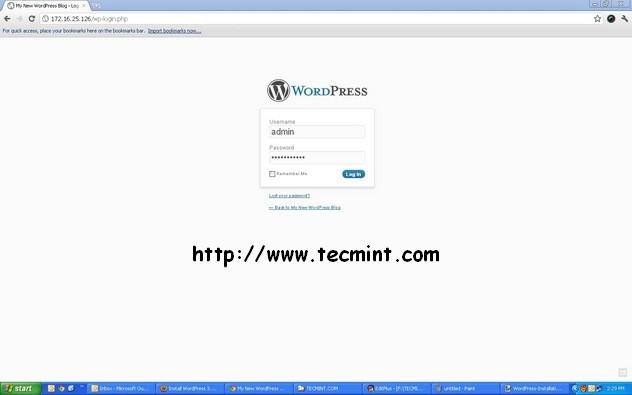
Login into your WordPress Dashboard.
WordPress Login Screen
Enter your WordPress Login details.
Enter WordPress Login Details
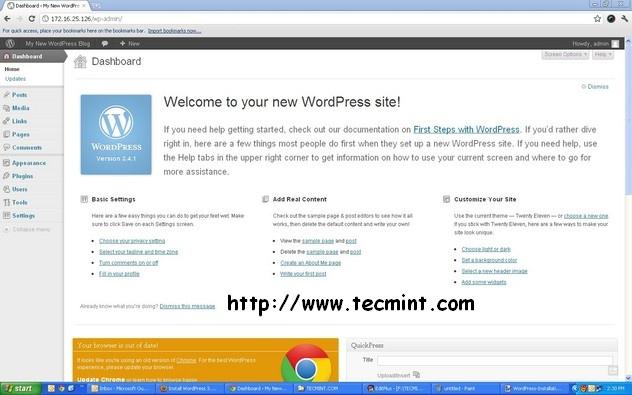
Welcome to WordPress Dashboard.
Welcome to WordPress Dashboard
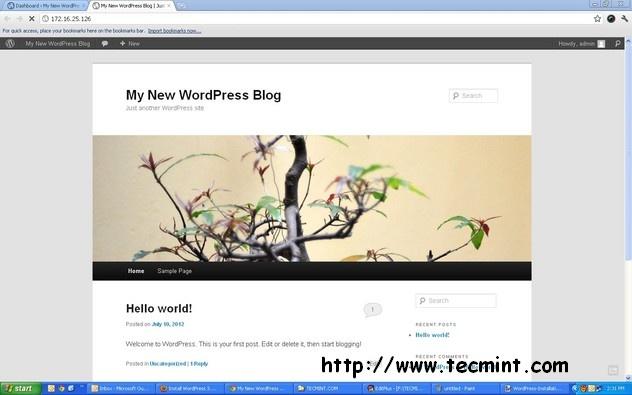
View your New WordPress blog.
View WordPress Blog
View WordPress Blog

Method B: Installing WordPress 3.5.2 for Nginx on RHEL, CentOS & Fedora

Step 1: Creating WordPress Directories for Nginx

# mkdir -p /srv/www/wordpress/public_html
# mkdir /srv/www/wordpress/logs
# chown -R nginx:nginx /srv/www/wordpress

Step 2: Downloading and Extracting WordPress 3.5.2 for Nginx

cd /tmp
# wget http://wordpress.org/latest.tar.gz
# tar -xvzf latest.tar.gz -C /srv/www/wordpress/public_html --strip-components=1

Step 3: Creating MySQL Database WordPress

Connect to MySQL server and run the following commands to create database and grant privileges.
## Connect to MySQL Server & Enter Password (if any or leave blank)## 
mysql -u root -p
Enter password:

## Creating New User for WordPress Database ##
CREATE USER wordpress@localhost IDENTIFIED BY "your_password_here";

## Create New Database ##
create database wordpress;

## Grant Privileges to Database ##
GRANT ALL ON wordpress.* TO wordpress@localhost;

## FLUSH privileges ##
FLUSH PRIVILEGES;

## Exit ##
exit
Please replace text a shown in Red color with your appropriate Database Name, User and Password. These settings we will required later.

Step 4: Creating Nginx VirtualHost For WordPress

If you’ve followed our LEMP guide these directories are already created. In case, if not then please create it by running these commands.
# mkdir /etc/nginx/sites-available
# mkdir /etc/nginx/sites-enabled
Add the following line of code to /etc/nginx/nginx.conf file, After the line that says “include /etc/nginx/conf.d/*.conf.
include /etc/nginx/sites-enabled/*;
Next create Nginx virtualhost file for WordPress.
# vi /etc/nginx/sites-available/wordpress
Add the following content to /etc/nginx/sites-available/wordpress file.
server {
    server_name wordpress;
    access_log /srv/www/wordpress/logs/access.log;
    error_log /srv/www/wordpress/logs/error.log;
    root /srv/www/wordpress/public_html;

    location / {
        index index.php;
    }

    # Disable favicon.ico logging
    location = /favicon.ico {
        log_not_found off;
        access_log off;
    }

    # Allow robots and disable logging
    location = /robots.txt {
        allow all;
        log_not_found off;
        access_log off;
    }

    # Enable permalink structures
    if (!-e $request_filename) {
        rewrite . /index.php last;
    }

    # Handle php requests
    location ~ \.php$ {
        include /etc/nginx/fastcgi_params;
        fastcgi_pass  127.0.0.1:9000;
        fastcgi_index index.php;
        fastcgi_param SCRIPT_FILENAME /srv/www/wordpress/public_html$fastcgi_script_name;
    }

    # Disable static content logging and set cache time to max
    location ~* \.(js|css|png|jpg|jpeg|gif|ico)$ {
        expires max;
        log_not_found off;
    }

    # Deny access to htaccess and htpasswd files
    location ~ /\.ht {
        deny  all;
    }
}
Create symlink for sites enabled directory.
# cd /etc/nginx/sites-enabled/
# ln -s /etc/nginx/sites-available/wordpress
Restart the Nginx server to reflect changes.
# service nginx restart
Add the following line to /etc/hosts file.
127.0.0.1  wordpress

Step 5: Configuring WordPress Installation

Copy default wp-config-sample.php to wp-config.php to configure WordPress installation.
# cd /srv/www/wordpress/public_html
# cp wp-config-sample.php wp-config.php
Modify the following database settings as we created in the Step #3 above.
// ** MySQL settings - You can get this info from your web host ** //
/** The name of the database for WordPress */
define('DB_NAME', 'database_name_here');

/** MySQL database username */
define('DB_USER', 'username_here');

/** MySQL database password */
define('DB_PASSWORD', 'password_here');

/** MySQL hostname */
define('DB_HOST', 'localhost');

/** Database Charset to use in creating database tables. */
define('DB_CHARSET', 'utf8');

/** The Database Collate type. Don't change this if in doubt. */
define('DB_COLLATE', '');
Now follow STEP 6 above for the WordPress installation.
In case, if you are having any trouble while installing please do let me know via comments and don’t forget to share this article with your friends.

How to set up an Ldap Server on Ubuntu 12.04 LTS

Today I will show you how to set up an ldap server on Ubuntu 12.04 LTS.


First we need to install the packages we need so in a terminal type:
sudo apt-get install slapd ldap-utils
During installation you will be asked for an ldap administrator password.  You should choose one and then retype it.
The configurations example that follows uses a FQDN of comtech.com. You should change this to the FQDN of your organisation.
Now we need to add some additional schema files. In a terminal enter:
sudo ldapadd -Y EXTERNAL -H ldapi:/// -f /etc/ldap/schema/cosine.ldif
sudo ldapadd -Y EXTERNAL -H ldapi:/// -f /etc/ldap/schema/nis.ldif
sudo ldapadd -Y EXTERNAL -H ldapi:/// -f /etc/ldap/schema/inetorgperson.ldif
Now make a file called backend.comtech.com.ldif somewhere on your system and add the following configuration to it.
# Load dynamic backend modules
dn: cn=module,cn=config
objectClass: olcModuleList
cn: module
olcModulepath: /usr/lib/ldap
olcModuleload: back_hdb.la
# Database settings
dn: olcDatabase=hdb,cn=config
objectClass: olcDatabaseConfig
objectClass: olcHdbConfig
olcDatabase: {1}hdb
olcSuffix: dc=comtech,dc=com
olcDbDirectory: /var/lib/ldap
olcRootDN: cn=admin,dc=comtech,dc=com
olcRootPW: secret
olcDbConfig: set_cachesize 0 2097152 0
olcDbConfig: set_lk_max_objects 1500
olcDbConfig: set_lk_max_locks 1500
olcDbConfig: set_lk_max_lockers 1500
olcDbIndex: objectClass eq
olcLastMod: TRUE
olcDbCheckpoint: 512 30
olcAccess: to attrs=userPassword by dn=”cn=admin,dc=comtech,dc=com” write by anonymous auth by self write by * none
olcAccess: to attrs=shadowLastChange by self write by * read
olcAccess: to dn.base=”" by * read
olcAccess: to * by dn=”cn=admin,dc=comtech,dc=com” write by * read
We now need to add the LDIF to the directory so in a terminal type:
sudo ldapadd -Y EXTERNAL -H ldapi:/// -f  backend.comtech.com.ldif
Now create a file called frontend.comtech.com.ldif somewhere on your system and add the following configuration to it.
# Create top-level object in domain
dn: dc=comtech,dc=com
objectClass: top
objectClass: dcObject
objectclass: organization
o: Comtech
dc: comtech
description: Comtech LDAP Configuration
# Admin user.
dn: cn=admin,dc=comtech,dc=com
objectClass: simpleSecurityObject
objectClass: organizationalRole
cn: admin
description: LDAP administrator
userPassword: (ADD YOUR OWN PASSWORD HERE)
dn: ou=people,dc=comtech,dc=com
objectClass: organizationalUnit
ou: people
dn: ou=groups,dc=comtech,dc=com
objectClass: organizationalUnit
ou: groups
dn: uid=bob,ou=people,dc=comtech,dc=com
objectClass: inetOrgPerson
objectClass: posixAccount
objectClass: shadowAccount
uid: Bob
sn: Wates
givenName: Bob
cn: Bob Wates
displayName: Bob Wates
uidNumber: 1000
gidNumber: 10000
userPassword: password
gecos: Bob Wates
loginShell: /bin/bash
homeDirectory: /home/bob
shadowExpire: -1
shadowFlag: 0
shadowWarning: 7
shadowMin: 8
shadowMax: 999999
shadowLastChange: 10877
mail: bob.wates@comtech.com
postalCode: CF24
l: Cardiff
o: Comtech
mobile: +44 (0)7 xx xx xx xx
homePhone: +44 (0)1 xx xx xx xx x
title: System Administrator
postalAddress:
initials: BW
dn: cn=comtech,ou=groups,dc=comtech,dc=com
objectClass: posixGroup
cn: comtech
gidNumber: 10000
Now we need to add the entries to the LDAP directory.  In a terminal type:
sudo ldapadd -x -D cn=admin,dc=comtech,dc=com -W -f frontend.comtech.com.ldif
You will be asked for the ldap administration password.  This is the password in the admin section of the frontend.comtech.com.ldif file.
All that is left to do is to test the configuration so in a terminal type:
ldapsearch -xLLL -b “dc=comtech,dc=com” uid=bob sn givenName cn
If your files are configured correctly then you get the following output.
dn: uid=bob,ou=people,dc=comtech,dc=com
cn: Bob Wates
sn: Wates
givenName: Bob

Part 1: Installing puppet 2.6.1 on CentOS with YUM/RPM


Installing Puppetmaster 2.6.1

Assuming, like me, the thought of letting rubygems vommit all over your filesystem is not a pleasant one, then how to get the latest puppet 2.6.1 installed on CentOS 5.5 with yum isn’t very clear. Things may differ on other peoples systems, but the below worked for me.


Set up yum repositories.

Do this on both the client and the server

Add the following files and save them to /etc/yum.repos.d/


puppet.repo
[puppetlabs]
name=Puppet Labs Packages
baseurl=http://yum.puppetlabs.com/base/
enabled=0
gpgcheck=0


epel.repo
[epel]
name=Extra Packages for Enterprise Linux 5 - $basearch
#baseurl=http://download.fedoraproject.org/pub/epel/5/$basearch
mirrorlist=http://mirrors.fedoraproject.org/mirrorlist?repo=epel-5&arch=$basearch
failovermethod=priority
enabled=0
gpgcheck=0
 
 
[epel-puppet]
name=epel puppet
baseurl=http://tmz.fedorapeople.org/repo/puppet/epel/5/$basearch/
enabled=0
gpgcheck=0


ruby.repo
[ruby]
name=ruby
baseurl=http://repo.premiumhelp.eu/ruby/
gpgcheck=0
enabled=0


Note that we include ruby and puppetlabs as the next steps in this tutorial will be to configure puppet and install puppet-dashboard. We want to upgrade to ruby 1.8.6 in order to run puppet-dashboard, doing this now will save you some pain down the line.

Upgrade Ruby to 1.8.6

Do this on both the client and the server

As mentioned above, use the ruby repo to upgrade.

punch# yum --enablerepo="ruby" update ruby
[...]
==============================================================
 Package            Arch          Version               Repository     Size
==============================================================
Updating:
 ruby               i686          1.8.6.111-1           ruby          525 k
Updating for dependencies:
 ruby-libs          i686          1.8.6.111-1           ruby          2.6 M
 
Transaction Summary
===============================================================
Install       0 Package(s)
Upgrade       2 Package(s)
 
Total download size: 3.1 M
Is this ok [y/N]: y
[...]

Install Puppet Server

On your puppetmaster server:
punch# yum --enablerepo=epel,epel-puppet install puppet-server
 
[...]
Installing:
 puppet-server        noarch      2.6.1-0.3.rc3.el5       epel-puppet       20 k
Installing for dependencies:
 facter               noarch      1.5.8-0.2.rc2.el5       epel-puppet       55 k
 libselinux-ruby      i386        1.33.4-5.5.el5          base              60 k
 puppet               noarch      2.6.1-0.3.rc3.el5       epel-puppet      818 k
 ruby-augeas          i386        0.3.0-1.el5             epel              19 k
 ruby-shadow          i386        1.4.1-7.el5             epel             9.5 k
 
Install       6 Package(s)
Upgrade       0 Package(s)
 
Total download size: 981 k
Is this ok [y/N]: y
[...]


On your puppet client
judy# yum --enablerepo="epel,epel-puppet" install puppet
 
[...]
Installing:
 puppet            noarch   2.6.1-0.3.rc3.el5      epel-fedora   818 k
Installing for dependencies:
 facter            noarch   1.5.8-0.2.rc2.el5      epel-fedora    55 k
 libselinux-ruby   i386     1.33.4-5.5.el5         base           60 k
 ruby-augeas       i386     0.3.0-1.el5            epel           19 k
 ruby-shadow       i386     1.4.1-7.el5            epel          9.5 k
Install       5 Package(s)
Upgrade       0 Package(s)
 
Total download size: 961 k
Is this ok [y/N]: y

That’s it, in part 2 and 3 we will install our client and server and install dashboard.


Part 2: Puppet 2.6.1, configure puppetmaster and puppetd

Configure Puppetmaster

For installing puppetmaster 2.4.1 on CentOS please click here for Part 1


In Part 1 we covered installing the Puppetmaster and Puppetd packages on Centos 5.5. We will now configure a very basic client/server model to serve the /etc/resolv.conf file to our client. Simple enough!

Create your first module

Our first module will be called networking::resolver, it’s job will be to push out a resolve.conf file to clients.


Create the directory structure under /etc/puppet
punch# cd /etc/puppet
punch# mkdir modules
punch# mkdir modules/networking
punch# mkdir modules/networking/files
punch# mkdir modules/networking/manifests
punch# mkdir files

Create your resolv.conf file
punch# vi modules/networking/files/resolv.conf
Create your module manifest
punch# vi modules/networking/manifests/init.pp
class networking {
    # Here you can add stuff to be inhereted by your networking classes
    # We won't bother for this demonstration, but just for show!
}
 
class networking::resolver inherits networking { 
          file { "/etc/resolv.conf": 
              ensure => present,
              source => "puppet:///modules/networking/resolv.conf",
              group   => "root",
              owner => "root",
              mode  => "0755"
          }
}

Configure your site and nodes

Create a minimal site.pp
punch# vi manifests/site.pp
import "nodes"
import "templates"
 
filebucket { main: server => puppet }


Create a tempates file
punch# vi manifests/templates.pp
class baseclass { 
        include networking::resolver
}
 
node default { 
        include baseclass
}

Create your node file


Don’t forget to replace judy.craigdunn.org with the fqdn of your client server
punch# vi manifests/nodes.pp
node 'basenode' { 
  include baseclass
}
 
node 'judy.craigdunn.org' inherits basenode { 
}

Set up puppetmaster parameters


Create default configuration


This is a minimal puppet.conf file, a more detailed file can be produced with puppetmasterd –genconfig


The autosign will automatically sign certs for new clients, this is discouraged in a production environment but useful for testing. For information on running puppetmaster without autosign see the puppetca documentation.
punch# vi puppet.conf
[main]
    # The Puppet log directory.
    # The default value is '$vardir/log'.
    logdir = /var/log/puppet
 
    # Where Puppet PID files are kept.
    # The default value is '$vardir/run'.
    rundir = /var/run/puppet
 
    # Where SSL certificates are kept.
    # The default value is '$confdir/ssl'.
    ssldir = $vardir/ssl
 
[agent]
    # The file in which puppetd stores a list of the classes
    # associated with the retrieved configuratiion.  Can be loaded in
    # the separate ``puppet`` executable using the ``--loadclasses``
    # option.
    # The default value is '$confdir/classes.txt'.
    classfile = $vardir/classes.txt
 
    # Where puppetd caches the local configuration.  An
    # extension indicating the cache format is added automatically.
    # The default value is '$confdir/localconfig'.
    localconfig = $vardir/localconfig
    report = true
 
[master]
    autosign = true

Set permissions for your fileserver.

Note that this allows everything, you should restrict this in a production environment.
punch# vi fileserver.conf
[files]
  path /etc/puppet/files
  allow *
 
[modules]
  allow *
 
[plugins]
  allow *

Start puppetmaster
punch# service puppetmaster start
Starting puppetmaster:                                     [  OK  ]


The puppet client


Configure puppetd
On your client, edit puppet.conf and add the following in the [agent] section, remembering to change punch.craigdunn.org to the fqdn of your Puppetmaster.
judy# vi /etc/puppet/puppet.conf
[agent]
    server = punch.craigdunn.org
    report = true
    listen = true

Allow puppetrunner


Create a file called namespaceauth.conf and add the following, note in a production environment this should be restricted to the fqdn of your puppet master
judy# vi /etc/puppet/namespaceauth.conf
[puppetrunner]
allow *

Start puppetd
judy# service puppet start

View pending changes


Use –test along with –noop to do a dry run to view the changes that puppetd will make
judy# puppetd --noop --test
[...]
notice: /Stage[main]/Networking::Resolver/File[/etc/resolv.conf]/content: is 
{md5}e71a913327efa3ec8dae8c1a6df09b43, should be {md5}24b6444365e7e012e8fdc5f302b56e9c (noop)
[...]


Now you can run puppetd without –noop to pull in your new resolv.conf file


This is a very basic demonstration of creating a server/client pair with puppet. There is much more documentation on configuring and managing puppet here


Part 3: Installing puppet-dashboard on CentOS / Puppet 2.6.1

Puppet Dashboard

Puppet dashboard is a fairly new app with loads of future potential and is great for monitoring your puppet estate. This is a quick guide to getting it running on puppet 2.6.1. Be sure you have the correct yum repos and ruby versions installed, see Part 1 and Part 2 for more details.


Install the puppet-dashboard package.

punch# yum --enablerepo=puppetlabs,ruby,epel install puppet-dashboard
[...]
Installing for dependencies:
 mysql                        i386               5.0.77-4.el5_5.3            
 ruby-irb                     i686               1.8.6.111-1                 
 ruby-mysql                   i686               2.7.4-1                     
 ruby-rdoc                    i686               1.8.6.111-1                 
 rubygem-rake                 noarch             0.8.7-2.el5                 
 rubygems                     noarch             1.3.1-1.el5                 
Install       7 Package(s)
Upgrade       0 Package(s)
 
Total download size: 11 M
Is this ok [y/N]: y
[...]

Create a MySQL database for puppet-dashboard

Create a database for puppet-dashboard to use and set up a user with all privileges to use it. This can be done on a seperate host.
mysql> CREATE DATABASE puppetdash;
Query OK, 1 row affected (0.00 sec)
 
mysql> GRANT ALL PRIVILEGES ON puppetdash.* TO puppet@'%' IDENTIFIED BY 'punchandjudy';
Query OK, 0 rows affected (0.00 sec)

Configure database.yaml

cd /usr/share/puppet-dashboard
vi config/database.yaml
Add your database parameters to the development section, note that host: can be ommitted if you are using local sockets to connect to MySQL.
development:
  host: professor.craigdunn.org
  database: puppetdash
  username: puppet
  password: punchandjudy
  encoding: utf8
  adapter: mysql

Migrate the database
punch# rake RAILS_ENV=development db:migrate
[...]
(in /usr/share/puppet-dashboard)
==  BasicSchema: migrating ====================================================
-- create_table(:assignments, {:force=>true})
   -> 0.0072s
-- create_table(:nodes, {:force=>true})
   -> 0.0030s
-- create_table(:services, {:force=>true})
   -> 0.0026s
==  BasicSchema: migrated (0.0132s) ===========================================
[...]

Copy reports module to site_ruby


I hate doing this but puppetmasterd explicitly looks for reports in puppet/reports and so far I haven’t found a clean workaround to tell it to look in /usr/share/puppet-dashboard for it. If anyone knows of a way, please email me.
punch# cp /usr/share/puppet-dashboard/ext/puppet/puppet_dashboard.rb /usr/lib/ruby/site_ruby/1
.8/puppet/reports

Edit your puppet.conf

Include the following in the [master] section, changing punch.craigdunn.org to your puppet server
[master]
reports = puppet_dashboard,store
reportdir = /var/lib/puppet/reports
reporturl = http://punch.craigdunn.org:3000/reports

Restart puppetmaster and start puppet-dashboard

punch# service puppetmaster restart
Stopping puppetmaster:                                     [  OK  ]
Starting puppetmaster:                                      [  OK  ]
punch# service puppet-dashboard start
Starting puppet-dashboard:                                 [  OK  ]

Test web GUI

Go to the following link in your browser (replacing the hostname with your fqdn)
http://punch.craigdunn.org:3000/

Configure the client

Edit puppet.conf

Make sure the following things are set in the [agent] section of puppet.conf on your client node.
judy# vi /etc/puppet/puppet.conf
[agent]
    report = true


Run puppet in noop mode on the client
judy# puppetd --noop --test

Refresh browser

If all has gone well, you should now see your reports in puppet dashboard for your client node.

Linux's directory structure - 1.2

As you may have noticed, Linux organizes its files differently from Windows. First the directory structure may seem unlogical and strange and you have no idea where all the programs, icons, config files, and others are. This tuXfile will take you to a guided tour through the Linux file system. This is by no means a complete list of all the directories on Linux, but it shows you the most interesting places in your file system.


< / >

The root directory. The starting point of your directory structure. This is where the Linux system begins. Every other file and directory on your system is under the root directory. Usually the root directory contains only subdirectories, so it's a bad idea to store single files directly under root.
Don't confuse the root directory with the root user account, root password (which obviously is the root user's password) or root user's home directory.

< /boot >

As the name suggests, this is the place where Linux keeps information that it needs when booting up. For example, this is where the Linux kernel is kept. If you list the contents of /boot, you'll see a file called vmlinuz - that's the kernel.

< /etc >

The configuration files for the Linux system. Most of these files are text files and can be edited by hand. Some interesting stuff in this directory:
/etc/inittab
A text file that describes what processes are started at system bootup and during normal operation. For example, here you can determine if you want the X Window System to start automatically at bootup, and configure what happens when a user presses Ctrl+Alt+Del.
/etc/fstab
This file contains descriptive information about the various file systems and their mount points, like floppies, cdroms, and so on.
/etc/passwd
A file that contains various pieces of information for each user account. This is where the users are defined.

< /bin, /usr/bin >

These two directories contain a lot of programs (binaries, hence the directory's name) for the system. The /bin directory contains the most important programs that the system needs to operate, such as the shells, ls, grep, and other essential things. /usr/bin in turn contains applications for the system's users. However, in some cases it really doesn't make much difference if you put the program in /bin or /usr/bin.

< /sbin, /usr/sbin >

Most system administration programs are stored in these directories. In many cases you must run these programs as the root user.

< /usr >

This directory contains user applications and a variety of other things for them, like their source codes, and pictures, docs, or config files they use. /usr is the largest directory on a Linux system, and some people like to have it on a separate partition. Some interesting stuff in /usr:
/usr/doc
Documentation for the user apps, in many file formats.
/usr/share
Config files and graphics for many user apps.
/usr/src
Source code files for the system's software, including the Linux kernel.
/usr/include
Header files for the C compiler. The header files define structures and constants that are needed for building most standard programs. A subdirectory under /usr/include contains headers for the C++ compiler.
/usr/X11R6
The X Window System and things for it. The subdirectories under /usr/X11R6 may contain some X binaries themselves, as well as documentation, header files, config files, icons, sounds, and other things related to the graphical programs.

< /usr/local >

This is where you install apps and other files for use on the local machine. If your machine is a part of a network, the /usr directory may physically be on another machine and can be shared by many networked Linux workstations. On this kind of a network, the /usr/local directory contains only stuff that is not supposed to be used on many machines and is intended for use at the local machine only.
Most likely your machine isn't a part of a network like this, but it doesn't mean that /usr/local is useless. If you find interesting apps that aren't officially a part of your distro, you should install them in /usr/local. For example, if the app would normally go to /usr/bin but it isn't a part of your distro, you should install it in /usr/local/bin instead. When you keep your own programs away from the programs that are included in your distro, you'll avoid confusion and keep things nice and clean.

< /lib >

The shared libraries for programs that are dynamically linked. The shared libraries are similar to DLL's on Winblows.

< /home >

This is where users keep their personal files. Every user has their own directory under /home, and usually it's the only place where normal users are allowed to write files. You can configure a Linux system so that normal users can't even list the contents of other users' home directories. This means that if your family members have their own user accounts on your Linux system, they won't see all the w4r3z you keep in your home directory. ;-)

< /root >

The superuser's (root's) home directory. Don't confuse this with the root directory (/) of a Linux system.

< /var >

This directory contains variable data that changes constantly when the system is running. Some interesting subdirectories:
/var/log
A directory that contains system log files. They're updated when the system runs, and checking them out can give you valuable info about the health of your system. If something in your system suddenly goes wrong, the log files may contain some info about the situation.
/var/mail
Incoming and outgoing mail is stored in this directory.
/var/spool
This directory holds files that are queued for some process, like printing.

< /tmp >

Programs can write their temporary files here.

< /dev >

The devices that are available to a Linux system. Remember that in Linux, devices are treated like files and you can read and write devices like they were files. For example, /dev/fd0 is your first floppy drive, /dev/cdrom is your CD drive, /dev/hda is the first IDE hard drive, and so on. All the devices that a Linux kernel can understand are located under /dev, and that's why it contains hundreds of entries.

< /mnt >

This directory is used for mount points. The different physical storage devices (like the hard disk drives, floppies, CD-ROM's) must be attached to some directory in the file system tree before they can be accessed. This attaching is called mounting, and the directory where the device is attached is called the mount point.
The /mnt directory contains mount points for different devices, like /mnt/floppy for the floppy drive, /mnt/cdrom for the CD-ROM, and so on. However, you're not forced to use the /mnt directory for this purpose, you can use whatever directory you wish. Actually in some distros, like Debian and SuSE, the default is to use /floppy and /cdrom as mount points instead of directories under /mnt.

< /proc >

This is a special directory. Well, actually /proc is just a virtual directory, because it doesn't exist at all! It contains some info about the kernel itself. There's a bunch of numbered entries that correspond to all processes running on the system, and there are also named entries that permit access to the current configuration of the system. Many of these entries can be viewed.

< /lost+found >

Here Linux keeps the files that it restores after a system crash or when a partition hasn't been unmounted before a system shutdown. This way you can recover files that would otherwise have been lost.

< What next? >

If you're completely new to Linux, you might want to learn some commands for moving around in the file system, viewing text files, or manipulating the files. In that case I suggest you take a look at the set of tuXfiles in the Introduction to the Linux command line section.

OSI Model: Layers

Network Layer

The network layer manages device addressing. It defines protocols for opening and maintaining network path between systems. It is also manages data transmission and switching procedures. Routers operate at the network layer. The network layer looks at packet addresses to determine routing methods. If a packet is for the system on the local network, it is sent directly there. If it is addressed to the system on another segment, the packet is sent to the router, which forwards it on the desired network.

Data-Link Layer

The data link layer provides the rules for sending and receiving information across the physical connection between two systems. This layer provides error detection and control. Because this layer provides error control, higher layers do not need to handle such services. Switches and Bridges operate at this layer.

Physical Layer

Physical layer sends and receives the bits. This layer defines the physical characteristics of the medium such as connectors, electrical characteristics such as voltage levels, and functional aspects such as setting up and maintaining the physical link. Well-known physical layer interfaces for local area networks (LANs) include Ethernet, Token-Ring, and Fiber Distributed Data Interface (FDDI). Hubs and Repeaters work at this layer.

Presentation Layer

The presentation layer protocols are part of the user’s operating system and applications. In this layer information is formatted for display or printing. Tasks like interpretation of codes within the data (such as tabs or special graphics sequences), data compression, decompression, encryption and the translation of other character sets are performed here.

Session Layer

Session layer sets up manages, and then tears the sessions between Presentation layer entities. This layer coordinates communication between nodes, and offers three different modes of communications: Simplex, Half Duplex and Full Duplex.

Transport Layer

This layer breaks and reassembles the large data into data stream. It provides a high level of control for moving the information between systems, including prioritization, more sophisticated error handling, and security features. It controls packet sequence, regulates traffic, and finds duplicate packets. If data is missing from the packet, the receiving end transport layer protocol asks the sending end transport layer protocol to retransmit packets. This layer ensures that all data is in the proper order and received completely. 

The OSI model is divided in seven layers. These layers have been arranged in two groups. Top three layers define how the applications in the computers will communicate in with each other or with users. The bottom four layers define how the data is transmitted from one end to another.

Application
Presentation
Session
Transport
Network
Data Link
Physical

Application
Presentation
Session


Transport
Network
Data Link
Physical


The OSI reference model = Top 3 Layers + Bottom 4 Layers

Application Layer


It is the layer where users actually communicate to the computer system. Applications access the network services using defined procedures in this layer. The application layer is used to define the applications that handle file transfers, network management, terminal sessions, and message exchange etc.

What is the difference between TCP and UDP ?

Overview

TCP (Transmission Control Protocol) is the most commonly used protocol on the Internet. The reason for this is because TCP offers error correction. When the TCP protocol is used there is a "guaranteed delivery." This is due largely in part to a method called "flow control." Flow control determines when data needs to be re-sent, and stops the flow of data until previous packets are successfully transferred. This works because if a packet of data is sent, a collision may occur. When this happens, the client re-requests the packet from the server until the whole packet is complete and is identical to its original.

UDP (User Datagram Protocol) is anther commonly used protocol on the Internet. However, UDP is never used to send important data such as webpages, database information, etc; UDP is commonly used for streaming audio and video. Streaming media such as Windows Media audio files (.WMA) , Real Player (.RM), and others use UDP because it offers speed! The reason UDP is faster than TCP is because there is no form of flow control or error correction. The data sent over the Internet is affected by collisions, and errors will be present. Remember that UDP is only concerned with speed. This is the main reason why streaming media is not high quality.


On the contrary, UDP has been implemented among some trojan horse viruses. Hackers develop scripts and trojans to run over UDP in order to mask their activities. UDP packets are also used in DoS (Denial of Service) attacks. It is important to know the difference between TCP port 80 and UDP port 80. If you don't know what ports are go here.

Frame Structure

As data moves along a network, various attributes are added to the file to create a frame. This process is called encapsulation. There are different methods of encapsulation depending on which protocol and topology are being used. As a result, the frame structure of these packets differ as well. The images below show both the TCP and UDP frame structures.

TCP FRAME STRUCTURE

UDP FRAME STRUCTURE


The payload field contains the actually data. Notice that TCP has a more complex frame structure. This is largely due to the fact the TCP is a connection-oriented protocol. The extra fields are need to ensure the "guaranteed delivery" offered by TCP.

What are the differences between GRUB and LILO?


LILO (LInux LOader)
LILO stores information about the location of the kernel or other operating system on the Master Boot Record (MBR).


GNU GRUB (GRand Unified Boot loader)
GRUB has a more powerful, interactive command line interface
RUB will default to its command line interface where the user can boot the system manually.
GRUB may have difficulties booting certain hardware. LILO and GRUB do have a number of differences:

* LILO has no interactive command interface, whereas GRUB does.
* LILO does not support booting from a network, whereas GRUB does.
* LILO stores information regarding the location of the operating systems it can to load physically on the MBR. If you change your LILO config file, you have to rewrite the LILO stage one boot loader to the MBR. Compared with GRUB, this is a much more risky option since a misconfigured MBR could leave the system unbootable. With GRUB, if the configuration file is configured incorrectly, it will simply default to the GRUB command-line interface.