Well,
on the internet you will find a number of good and better ways to
install WordPress on Linux, but this installation guide is prepared for
my future reference as well as for those beginners who are new to
WordPress and
Linux platform. In this installation I will show you’ll how to install latest
WordPress 3.5.2 on
RHEL 6.4/6.3/6.2/6.1/6/5.8,
CentOS 6.4/6.3/6.2/6.1/6/5.8 and
Fedora 18,17,16,15,14,13,12 distributions.

Install WordPress Using Apache and Nginx
This guide has two way of installation, one is using
LAMP (
Linux, Apache, MySQL, PHP) and other is
LEMP (
Linux, Nginx, MySQL, PHP).
So, please select your installation method based on your web servers.
Before moving ahead let me provide you a little description about
WordPress,
LAMP &
LEMP.
What Is WordPress?
WordPress is an open source and free blogging application and a dynamic CMS (
Content Management System) developed using
MySQL and
PHP.
It has huge number of third party plugins and themes. WordPress
currently one of the most popular blogging platform available on the
internet and used by millions of people across the globe.
What Is LAMP and LEMP?
LAMP (
Linux, Apache, MySQL, PHP) and LEMP (
Linux, Nginx, MySQL, PHP) is an open source Web application platform that runs on Linux systems. Apache and Nginx both are Web servers, MySQL is RDMS (
Relational Database Management System) and PHP is a server side scripting language.
Install WordPress 3.5.2 on RHEL 6.4/6.3/6.2/6.1/6/5.8, CentOS 6.4/6.3/6.2/6.1/6/5.8 and Fedora 18,17,16,15,14,13,12
As I said above the installation method has two ways, one is using
Apache and other is
Nginx. So I have named it
A and
B. Those who want to install
WordPress on their
Apache server they can use
A method and those who want to install
WordPress using
Nginx they can follow method
B. In case, if you don’t have
LAMP or
LEMP setup on your systems, please use the following guides to install it.
Method A: Installing WordPress 3.5.2 for Apache on RHEL, CentOS & Fedora
This
Method A installation guide shows you how to install latest
WordPress 3.5.2 using
LAMP setup on
RHEL 6.4/6.3/6.2/6.1/6/5.8,
CentOS 6.4/6.3/6.2/6.1/6/5.8 and
Fedora 18,17,16,15,14,13,12.
Step 1: Downloading WordPress 3.5.2 for Apache
You must be root user to download the package.
# cd /tmp
# wget http://wordpress.org/latest.tar.gz
Step 2: Extracting WordPress 3.5.2 for Apache
Once the download finishes, run the following command to untar it.
# tar -xvzf latest.tar.gz -C /var/www/html
Step 3: Creating MySQL Database WordPress
Connect to
MySQL server and run the following commands to create database and grant privileges.
## Connect to MySQL Server & Enter Password (if any or leave blank)##
mysql -u root -p
Enter password:

## Creating New User for WordPress Database ##
CREATE USER wordpress@localhost IDENTIFIED BY "your_password_here";

## Create New Database ##
create database wordpress;

## Grant Privileges to Database ##
GRANT ALL ON wordpress.* TO wordpress@localhost;

## FLUSH privileges ##
FLUSH PRIVILEGES;

## Exit ##
exit
Please replace text a shown in
Red color with your appropriate
Database Name,
User and
Password. These settings we will required later.
Step 4: Creating Apache VirtualHost for WordPress
Open the file
/etc/httpd/conf/httpd.conf with
VI editor.
# vi /etc/httpd/conf/httpd.conf
Add the following lines of code at the bottom of the file. Replace the text shown in
Red color with your required settings.
  ServerAdmin tecmint@tecmint.com
  DocumentRoot /var/www/html/wordpress
  ServerName wordpress
  ErrorLog /var/log/httpd/wordpress-error-log
  CustomLog /var/log/httpd/wordpress-acces-log common
Next, restart the
Apache service to reflect changes.
# service httpd restart
Add the following line to
/etc/hosts file.
127.0.0.1 wordpress
Step 5: Configuring WordPress Installation
Copy default
wp-config-sample.php to
wp-config.php to configure WordPress installation.
# cd /var/www/html/wordpress
# cp wp-config-sample.php wp-config.php
Open
wp-config.php file.
# vi wp-config.php
Modify the following database settings as we created in the
Step #3 above.
// ** MySQL settings - You can get this info from your web host ** //
/** The name of the database for WordPress */
define('DB_NAME', 'database_name_here');

/** MySQL database username */
define('DB_USER', 'username_here');

/** MySQL database password */
define('DB_PASSWORD', 'password_here');

/** MySQL hostname */
define('DB_HOST', 'localhost');

/** Database Charset to use in creating database tables. */
define('DB_CHARSET', 'utf8');

/** The Database Collate type. Don't change this if in doubt. */
define('DB_COLLATE', '');
Step 6: Finishing WordPress Installation
Open your browser and type any of the following address.
http://wordpress/

http://localhost


http://your-ip
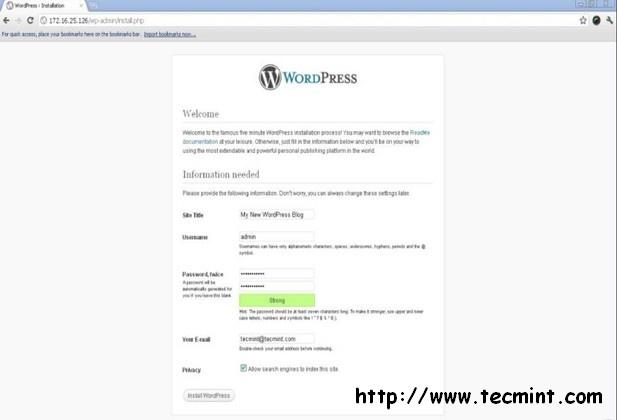
Give your
Site Title,
Create Admin User,
Create Admin Password,
Enter Your E-Mail and then click on
Install button.

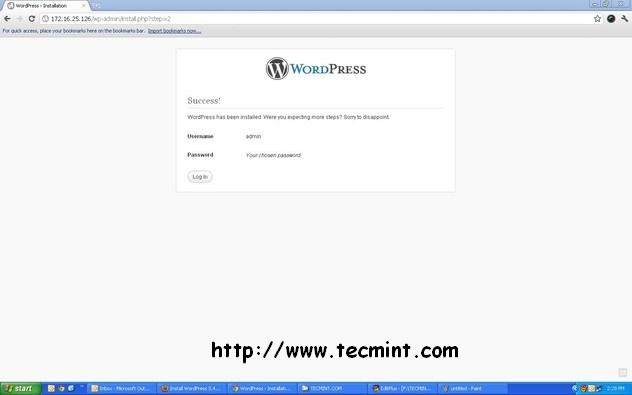
Creating WordPress Admin Login
Login into your WordPress Dashboard.

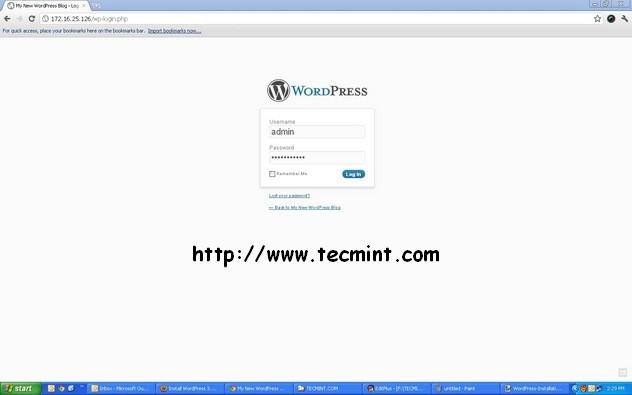
WordPress Login Screen
Enter your WordPress Login details.

Enter WordPress Login Details
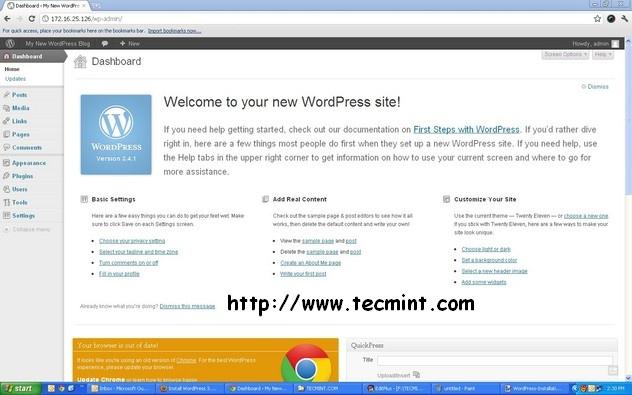
Welcome to WordPress Dashboard.

Welcome to WordPress Dashboard
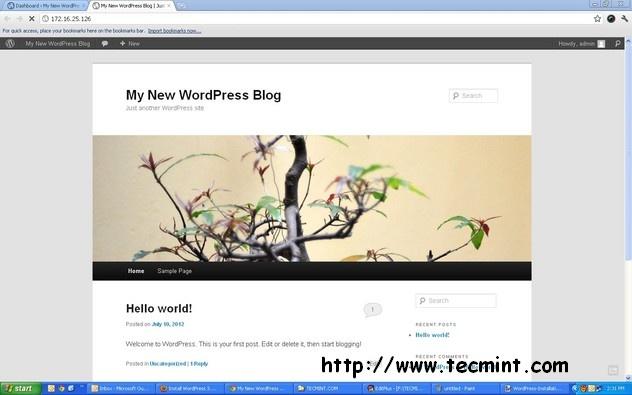
View your New WordPress blog.

View WordPress Blog
Method B: Installing WordPress 3.5.2 for Nginx on RHEL, CentOS & Fedora
Step 1: Creating WordPress Directories for Nginx
# mkdir -p /srv/www/wordpress/public_html
# mkdir /srv/www/wordpress/logs
# chown -R nginx:nginx /srv/www/wordpress
Step 2: Downloading and Extracting WordPress 3.5.2 for Nginx
cd /tmp
# wget http://wordpress.org/latest.tar.gz
# tar -xvzf latest.tar.gz -C /srv/www/wordpress/public_html --strip-components=1
Step 3: Creating MySQL Database WordPress
Connect to
MySQL server and run the following commands to create database and grant privileges.
## Connect to MySQL Server & Enter Password (if any or leave blank)##
mysql -u root -p
Enter password:

## Creating New User for WordPress Database ##
CREATE USER wordpress@localhost IDENTIFIED BY "your_password_here";

## Create New Database ##
create database wordpress;

## Grant Privileges to Database ##
GRANT ALL ON wordpress.* TO wordpress@localhost;

## FLUSH privileges ##
FLUSH PRIVILEGES;

## Exit ##
exit
Please replace text a shown in
Red color with your appropriate
Database Name,
User and
Password. These settings we will required later.
Step 4: Creating Nginx VirtualHost For WordPress
If you’ve followed our
LEMP guide these directories are already created. In case, if not then please create it by running these commands.
# mkdir /etc/nginx/sites-available
# mkdir /etc/nginx/sites-enabled
Add the following line of code to
/etc/nginx/nginx.conf file,
After the line that says “
include /etc/nginx/conf.d/*.conf.
include /etc/nginx/sites-enabled/*;
Next create Nginx virtualhost file for WordPress.
# vi /etc/nginx/sites-available/wordpress
Add the following content to
/etc/nginx/sites-available/wordpress file.
server {
    server_name wordpress;
    access_log /srv/www/wordpress/logs/access.log;
    error_log /srv/www/wordpress/logs/error.log;
    root /srv/www/wordpress/public_html;

    location / {
        index index.php;
    }

    # Disable favicon.ico logging
    location = /favicon.ico {
        log_not_found off;
        access_log off;
    }

    # Allow robots and disable logging
    location = /robots.txt {
        allow all;
        log_not_found off;
        access_log off;
    }

    # Enable permalink structures
    if (!-e $request_filename) {
        rewrite . /index.php last;
    }

    # Handle php requests
    location ~ \.php$ {
        include /etc/nginx/fastcgi_params;
        fastcgi_pass  127.0.0.1:9000;
        fastcgi_index index.php;
        fastcgi_param SCRIPT_FILENAME /srv/www/wordpress/public_html$fastcgi_script_name;
    }

    # Disable static content logging and set cache time to max
    location ~* \.(js|css|png|jpg|jpeg|gif|ico)$ {
        expires max;
        log_not_found off;
    }

    # Deny access to htaccess and htpasswd files
    location ~ /\.ht {
        deny  all;
    }
}
Create symlink for sites enabled directory.
# cd /etc/nginx/sites-enabled/
# ln -s /etc/nginx/sites-available/wordpress
Restart the Nginx server to reflect changes.
# service nginx restart
Add the following line to
/etc/hosts file.
127.0.0.1 wordpress
Step 5: Configuring WordPress Installation
Copy default
wp-config-sample.php to
wp-config.php to configure WordPress installation.
# cd /srv/www/wordpress/public_html
# cp wp-config-sample.php wp-config.php
Modify the following database settings as we created in the
Step #3 above.
// ** MySQL settings - You can get this info from your web host ** //
/** The name of the database for WordPress */
define('DB_NAME', 'database_name_here');

/** MySQL database username */
define('DB_USER', 'username_here');

/** MySQL database password */
define('DB_PASSWORD', 'password_here');

/** MySQL hostname */
define('DB_HOST', 'localhost');

/** Database Charset to use in creating database tables. */
define('DB_CHARSET', 'utf8');

/** The Database Collate type. Don't change this if in doubt. */
define('DB_COLLATE', '');
Now follow
STEP 6 above for the WordPress installation.
In
case, if you are having any trouble while installing please do let me
know via comments and don’t forget to share this article with your
friends.